I wrote these notes approximately a month into sculpting miniatures, with the hope that I could get some other people fast forwarded down the path. If you jump to the end, I've got links to folks that are doing a great job of tutorializing via videos.
With a year of sculpting miniatures hindsight, I might approach things different. Maybe I'll update this with better notes someday.
materials
some kind of wire to make armatures - I'm using 1mm steel galvanized stuff that I got at the hardware store. Some people use paperclips, but I found they break very easily. The important thing is that you want your armature to be very stable. I was initially using 0.5mm wire and my models were flexing all over the place. The sculpting media is pretty thick, so you gotta use some serious force to get it on the model.
you will need at a minimum, green stuff - this is sold as Kneadatite. Do not buy it from "the army painter" or "greenstuff world", they repackage it in a hilariously small pack and raise the price on it a shit load. Apparently you can use "grey stuff" aka procreate as an alternative, but I haven't tried it so I can't vouch for it.
once you have the greenstuff, you've got options:
- mix the greenstuff with milliput - I use a 50:50 ratio and its really nice. Greenstuff on its own cures to a quite soft consistency, and you can't sand it. adding milliput makes it cure rock hard. you can just mix all four parts together in one go, you don't have to do 2/2.
- put on a layer of greenstuff, then before it cures add some polymer clay (sculpy super firm or fimo). Polymer clay doesn't bond to the armature at this scale on its own, but the greenstuff will give you a bond you can work with. After that you can just layer up with poly clay as much as you want
- work in straight greenstuff - I've done this a little bit, and it has a different feel than working with the milliput mix.
- some people work in straight milliput, and I honestly don't understand how they get it done. Though I think thats how the oldschool people did their hard surface modeling.
- you can work in straight poly clay if you are going up in scale, just use foil as your armature, and it will bond fine. Or no armature at all if you are doing little lumpy dudes that don't need it.
Also, note: the hobby shop sold me some AK brand greenstuff that turned out to be liquid greenstuff. This is not a two part epoxy. You will not get anything done with this. Make sure you don't buy this (unless you know what its for and you are specifically buying this stuff)
VASELINE / Nivea hand cream The tools will stick, and it sucks asssssss. You need to get some lube on your tools. I've tried using water and spit, but neither of them work great. Also, when working with any miliput, water causes it to get silty and run off your model. I also tried eucerin, because that was the moisturizer I had on hand, and it didn't do anything nice either. Anyway, try out some vaseline, and you will get the nice smooth surface texture you are looking for. If you are using polyclay, you cannot use water, you need to use vaseline, otherwise it will get all crumbly when you bake it.
tools
Get yourself some clay shapers, and don't get the shitty ones from amazon. The amazon ones are way way way too soft. The pack I got was the royal sovereign size zero extra firms from blick, but I also had one of the non-extra firms and it was pretty good. Unfortunately these are quite expensive.
Scalpel / exacto knife - I've been using a scalpel with a number 11 blade. I find it nicer than the xacto, because its much cheaper, and the blade is quite a bit flexier, so you can use it remove stuff from a tile. Also xacto blades break all the time, and once you lose the tip you lose a ton of the value. On the downside I've been sculpting in bed and keep dropping a scalpel onto my chest, sometimes pointy end down. Don't do this.
A piece of tile for shaping things on - I'm using a tiny little marble sample from a flooring place. before I was using this, I was using parchment paper, but its much nicer to just have something ready to go. If you've got two of them, even better, you can make a consistently flat object that way.
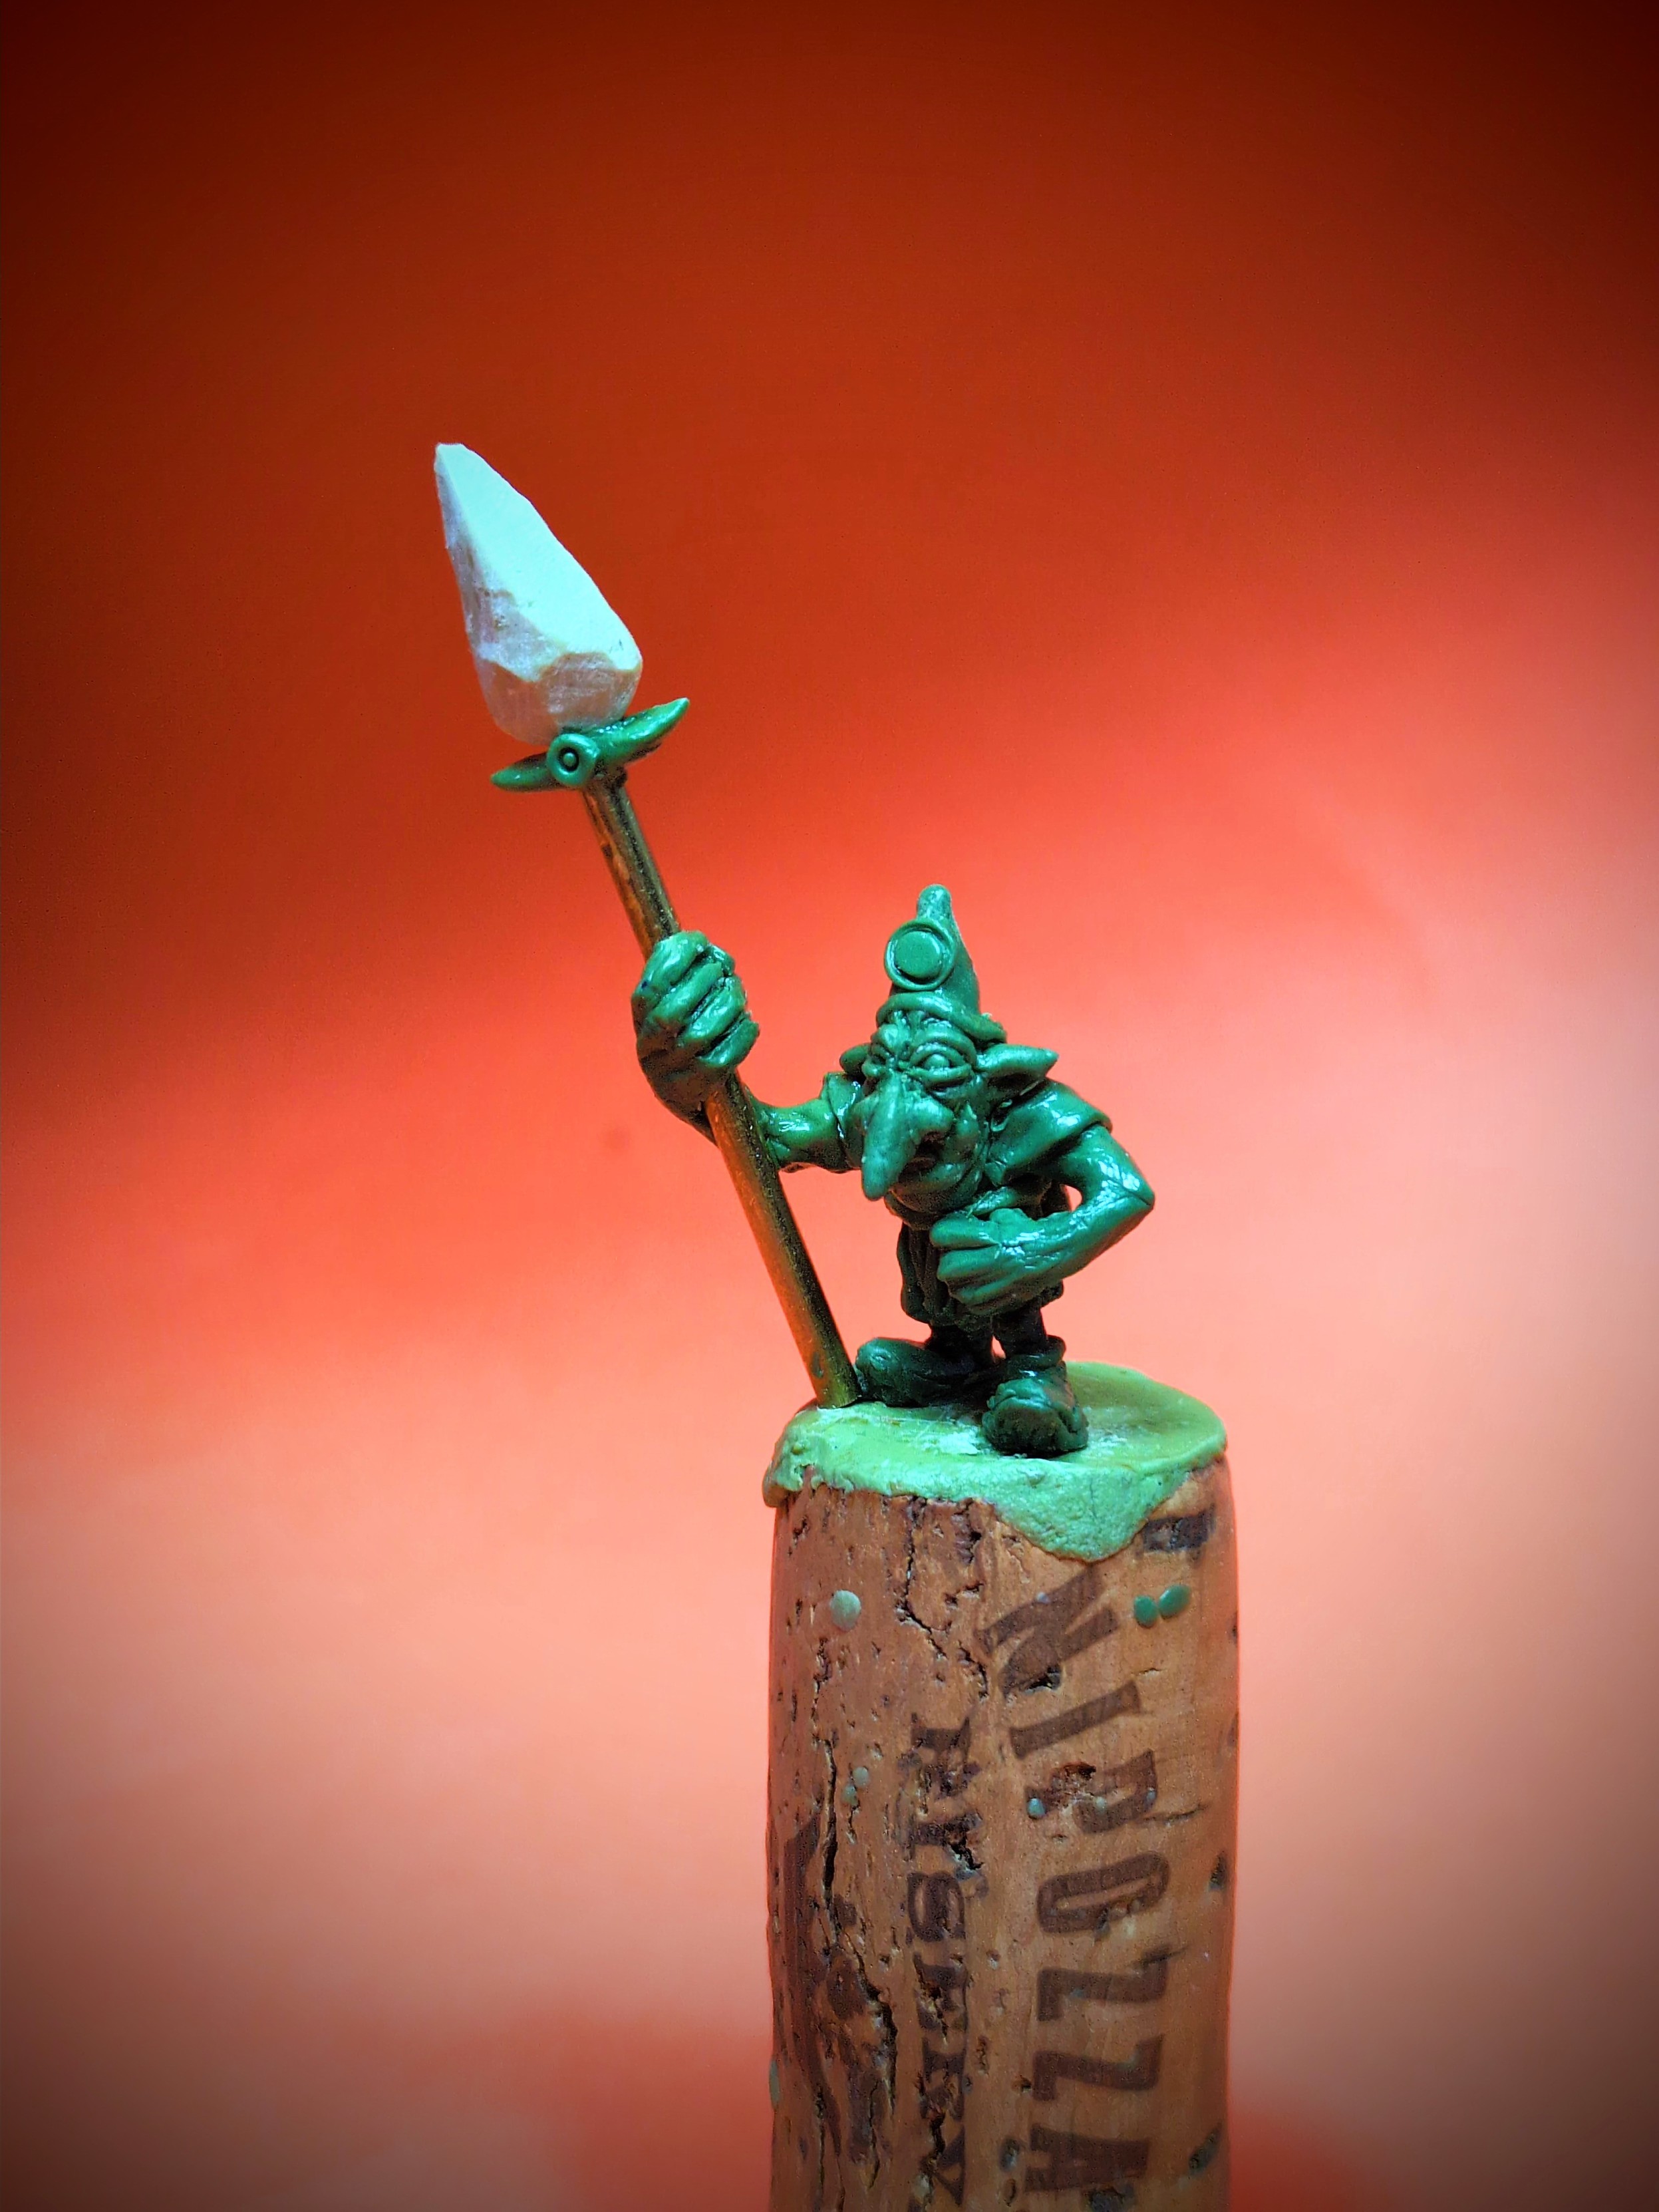
some cork - find a wine drinker. Make sure you cover the top with a layer of epoxy before working on it, if you attempt to adhear the models feet directly to the cork surface, they will detach, and you will be driven mad by your floppy model.
something for manipulating the armature wire - a pair of needlenose pliers and a way to cut the wire.
above are the only critical things I think - you can try out small wax tools / dental tools, but I wasn't having the greatest time with them. Lotsa people fashion their own tools, I made a hooky poker by filing down a piece of my armature wire, bending it, and epoxying it to a old paint brush.
A ball end pokey thing is real nice for adding texture - blick sells this as well. Its not quite a needle, its got a round tip. Again, get the smallest one you can.
I have a set of 10g makeup containers that I use for storing all my materials in my little sculpting kit. Not necessary, but cool that this whole thing (including the piece you are working on) can get rolled up in a bag that is about the size of a sketchbook.
While sculpting in bed, I've been using a super bright camping headlamp. I bet I look really cool.
sculpting notes
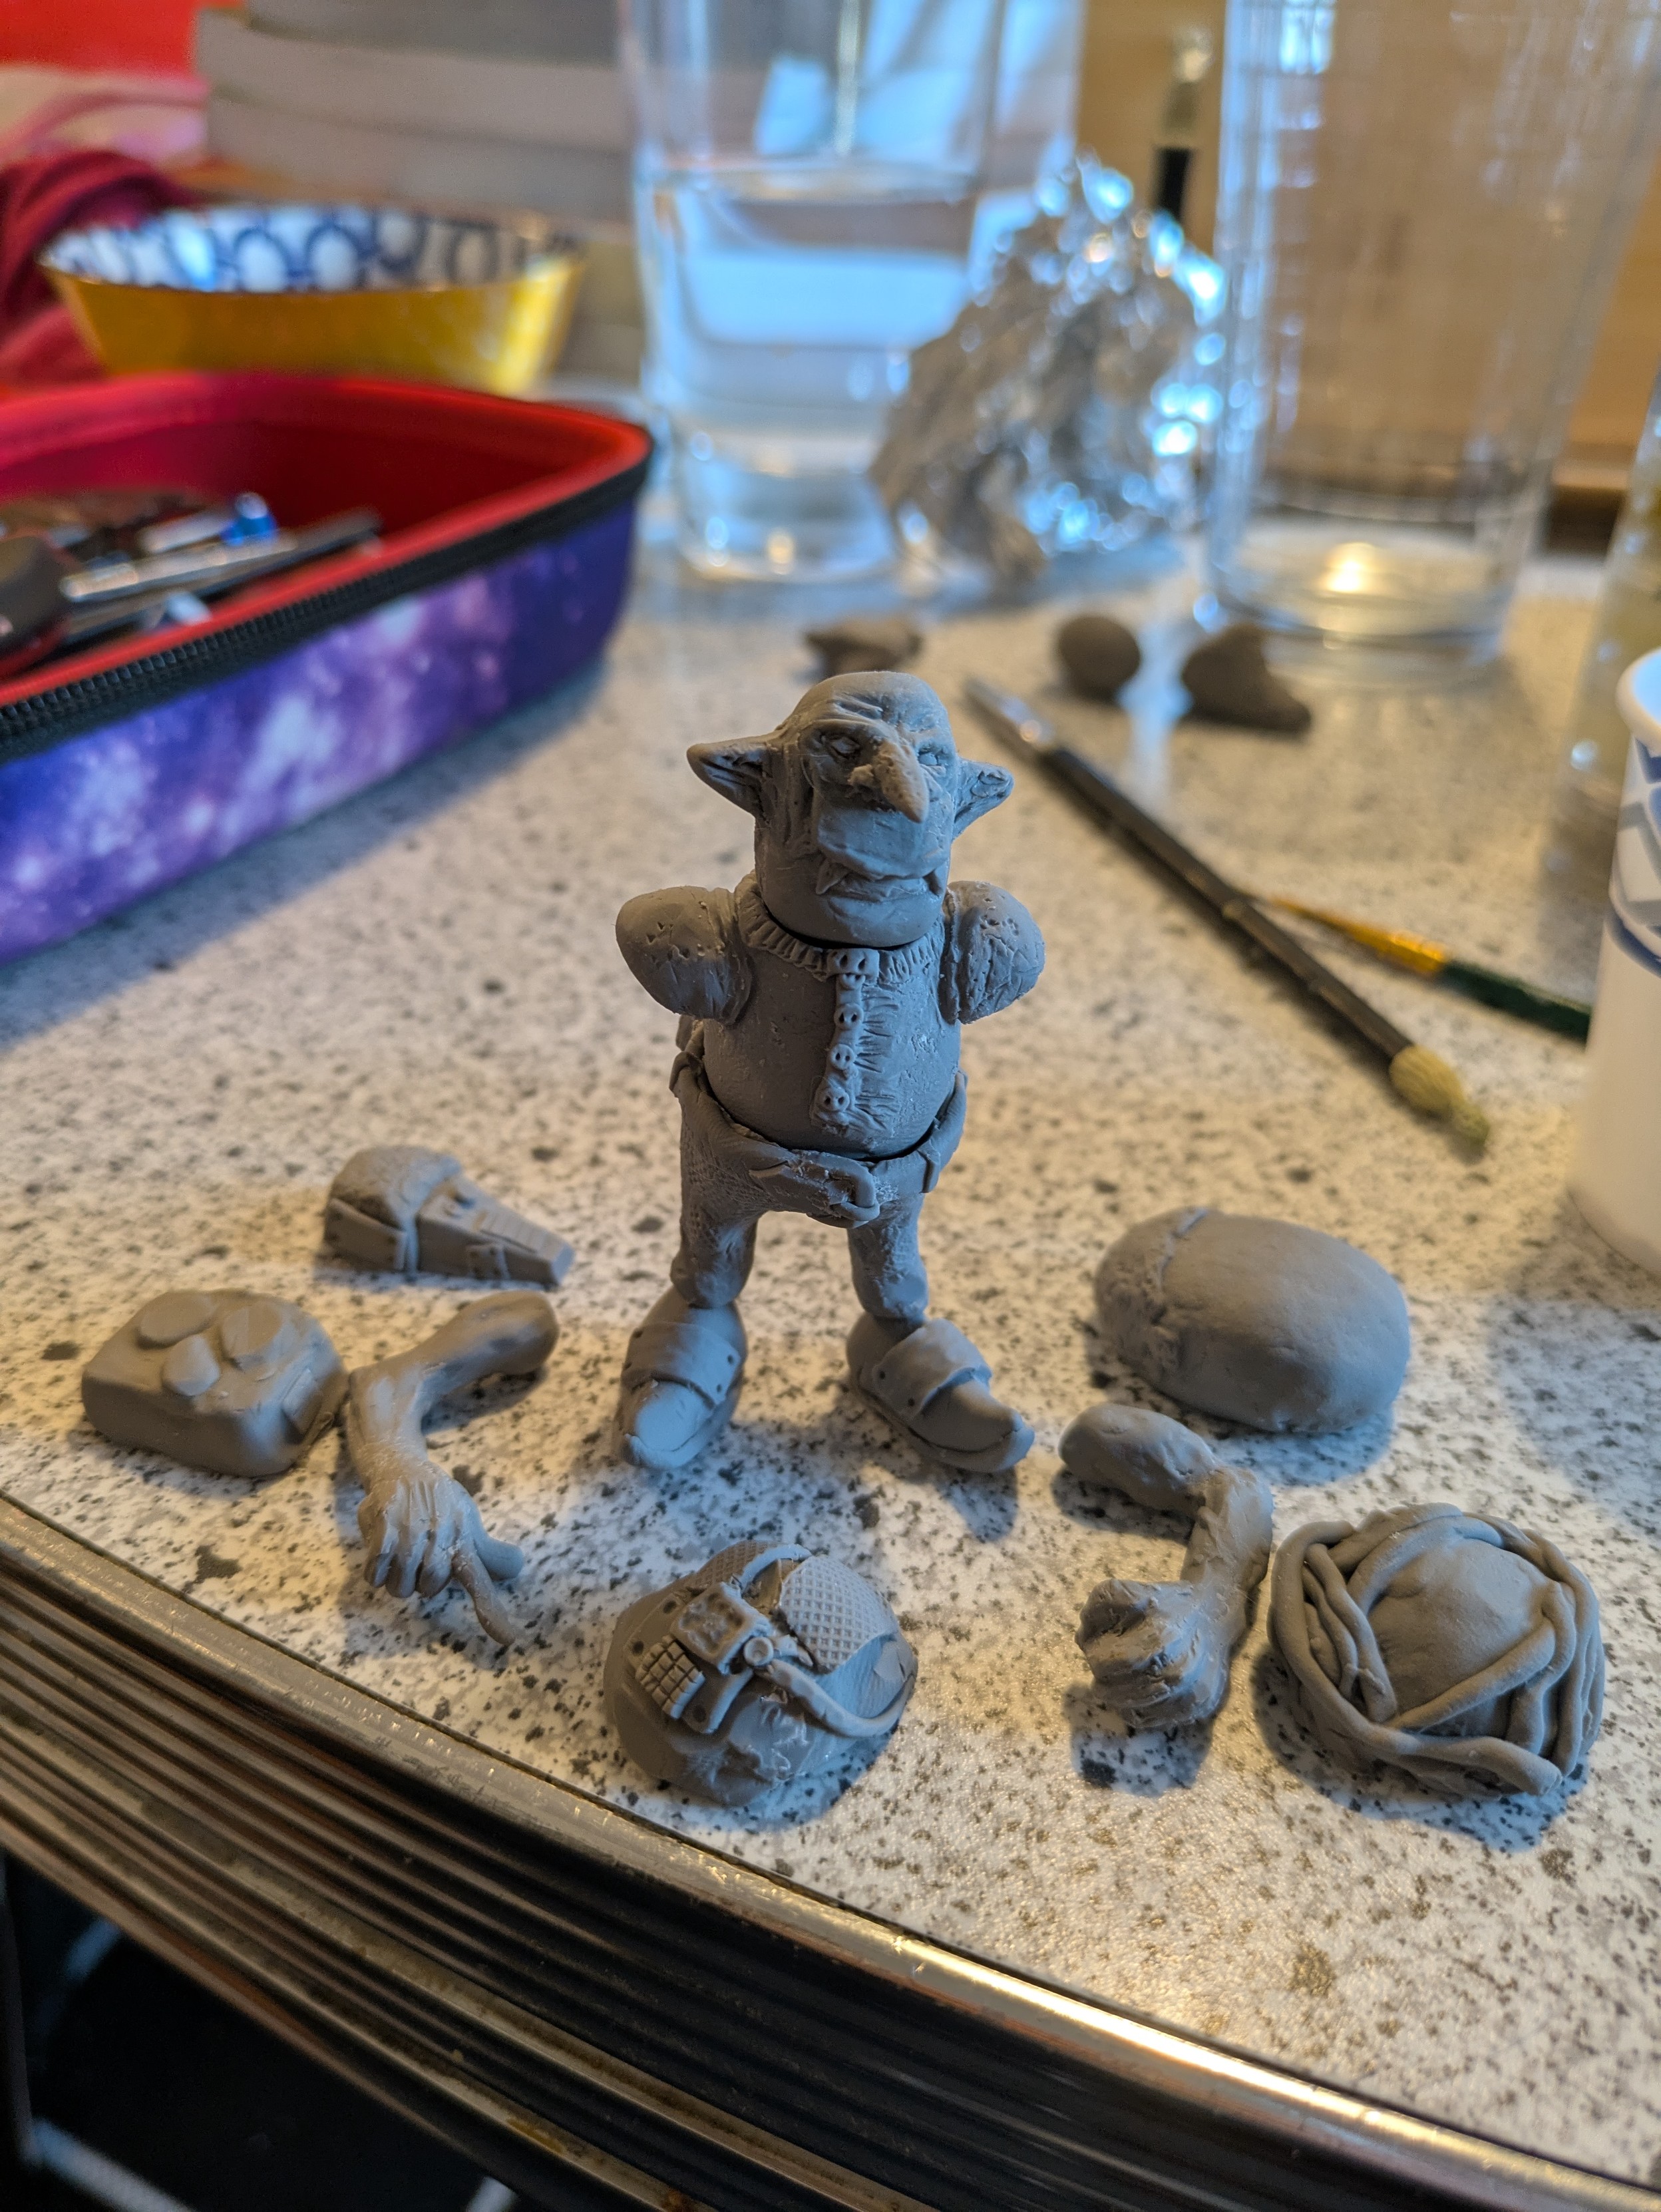
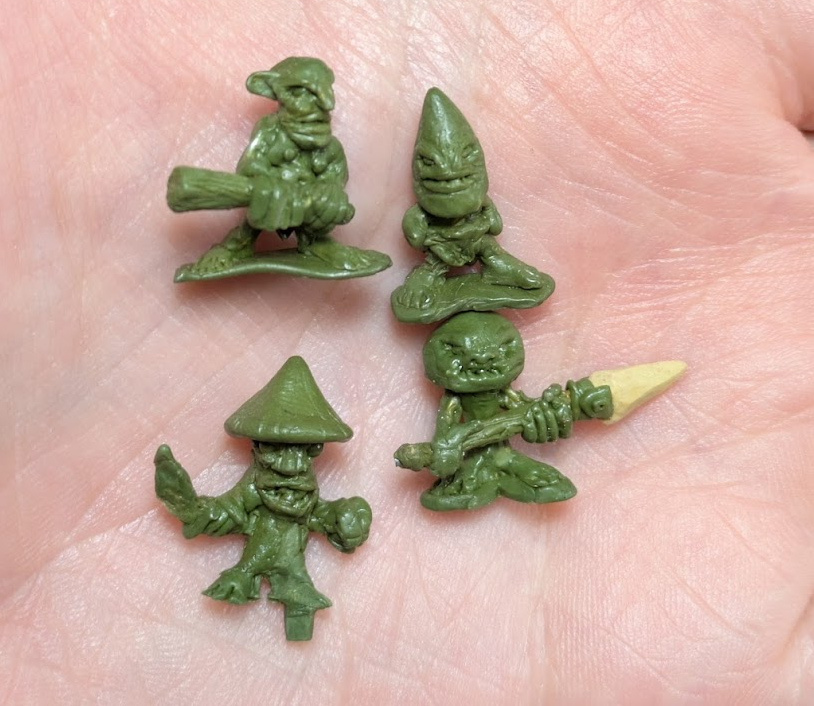
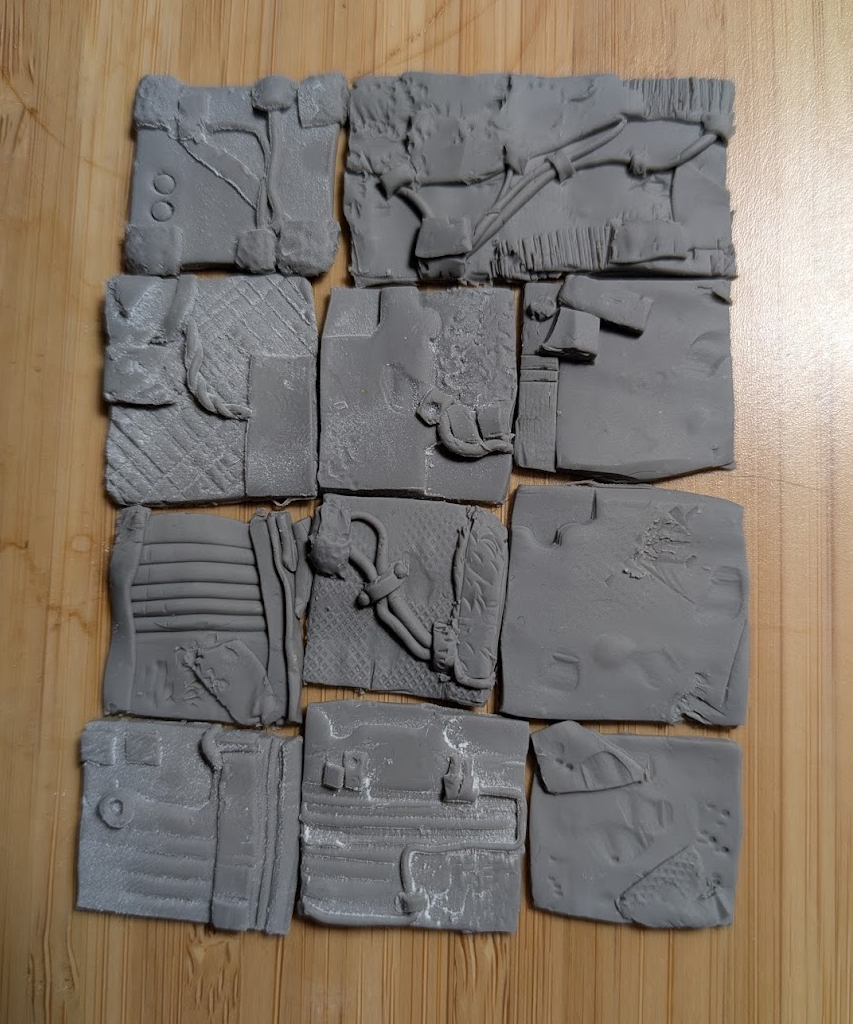
Its bonkers how tricky it is to work at this scale! While I'm finding that I can work the underlayers a bunch, for the upper layers and detailing, I find that I have to get it right the first go, or scrape the messup off and try it again. I end up working off the model quite a bunch, and transplanting the bits I've made onto the model. So stuff like strips, or cones, or little rolled up pieces cut to the correct size (bit of tile and scalpel for all this cutting).
There are tons of "tricks" if you dig around - stuff like making chainmail, dragonmail, chains, or skulls... wh40k is the locus :D but even if you aren't doing the tricks, the concepts are repeatable for other outcomes.
The vaseline for smoothing a blending is critical. I kept getting horrible surfaces and wondering why, and forgetting that I needed to grease up my tools. Apparently it can make it difficult to bond the layer after the layer that you smoothed with vaseline, but thats a problem for a different day imo. Folks told me to use water in the final pass? I dunno, if you figure out the answer here let me know, I'm still experimenting.
working in multiple passes is the way to go - you can speed up cure time (generally a few hours) by putting the piece under an incandescent lamp. I'm using a costco peanut can with a clamp lamp balanced precariously over it - this drops the cure time down to ~10 mins? Maybe less? I'm not sure, I actually keep turning my pieces brown with this assembly, but they don't seem to have gained any brittleness. This is not critical, you can also just chill or work on multiple models.
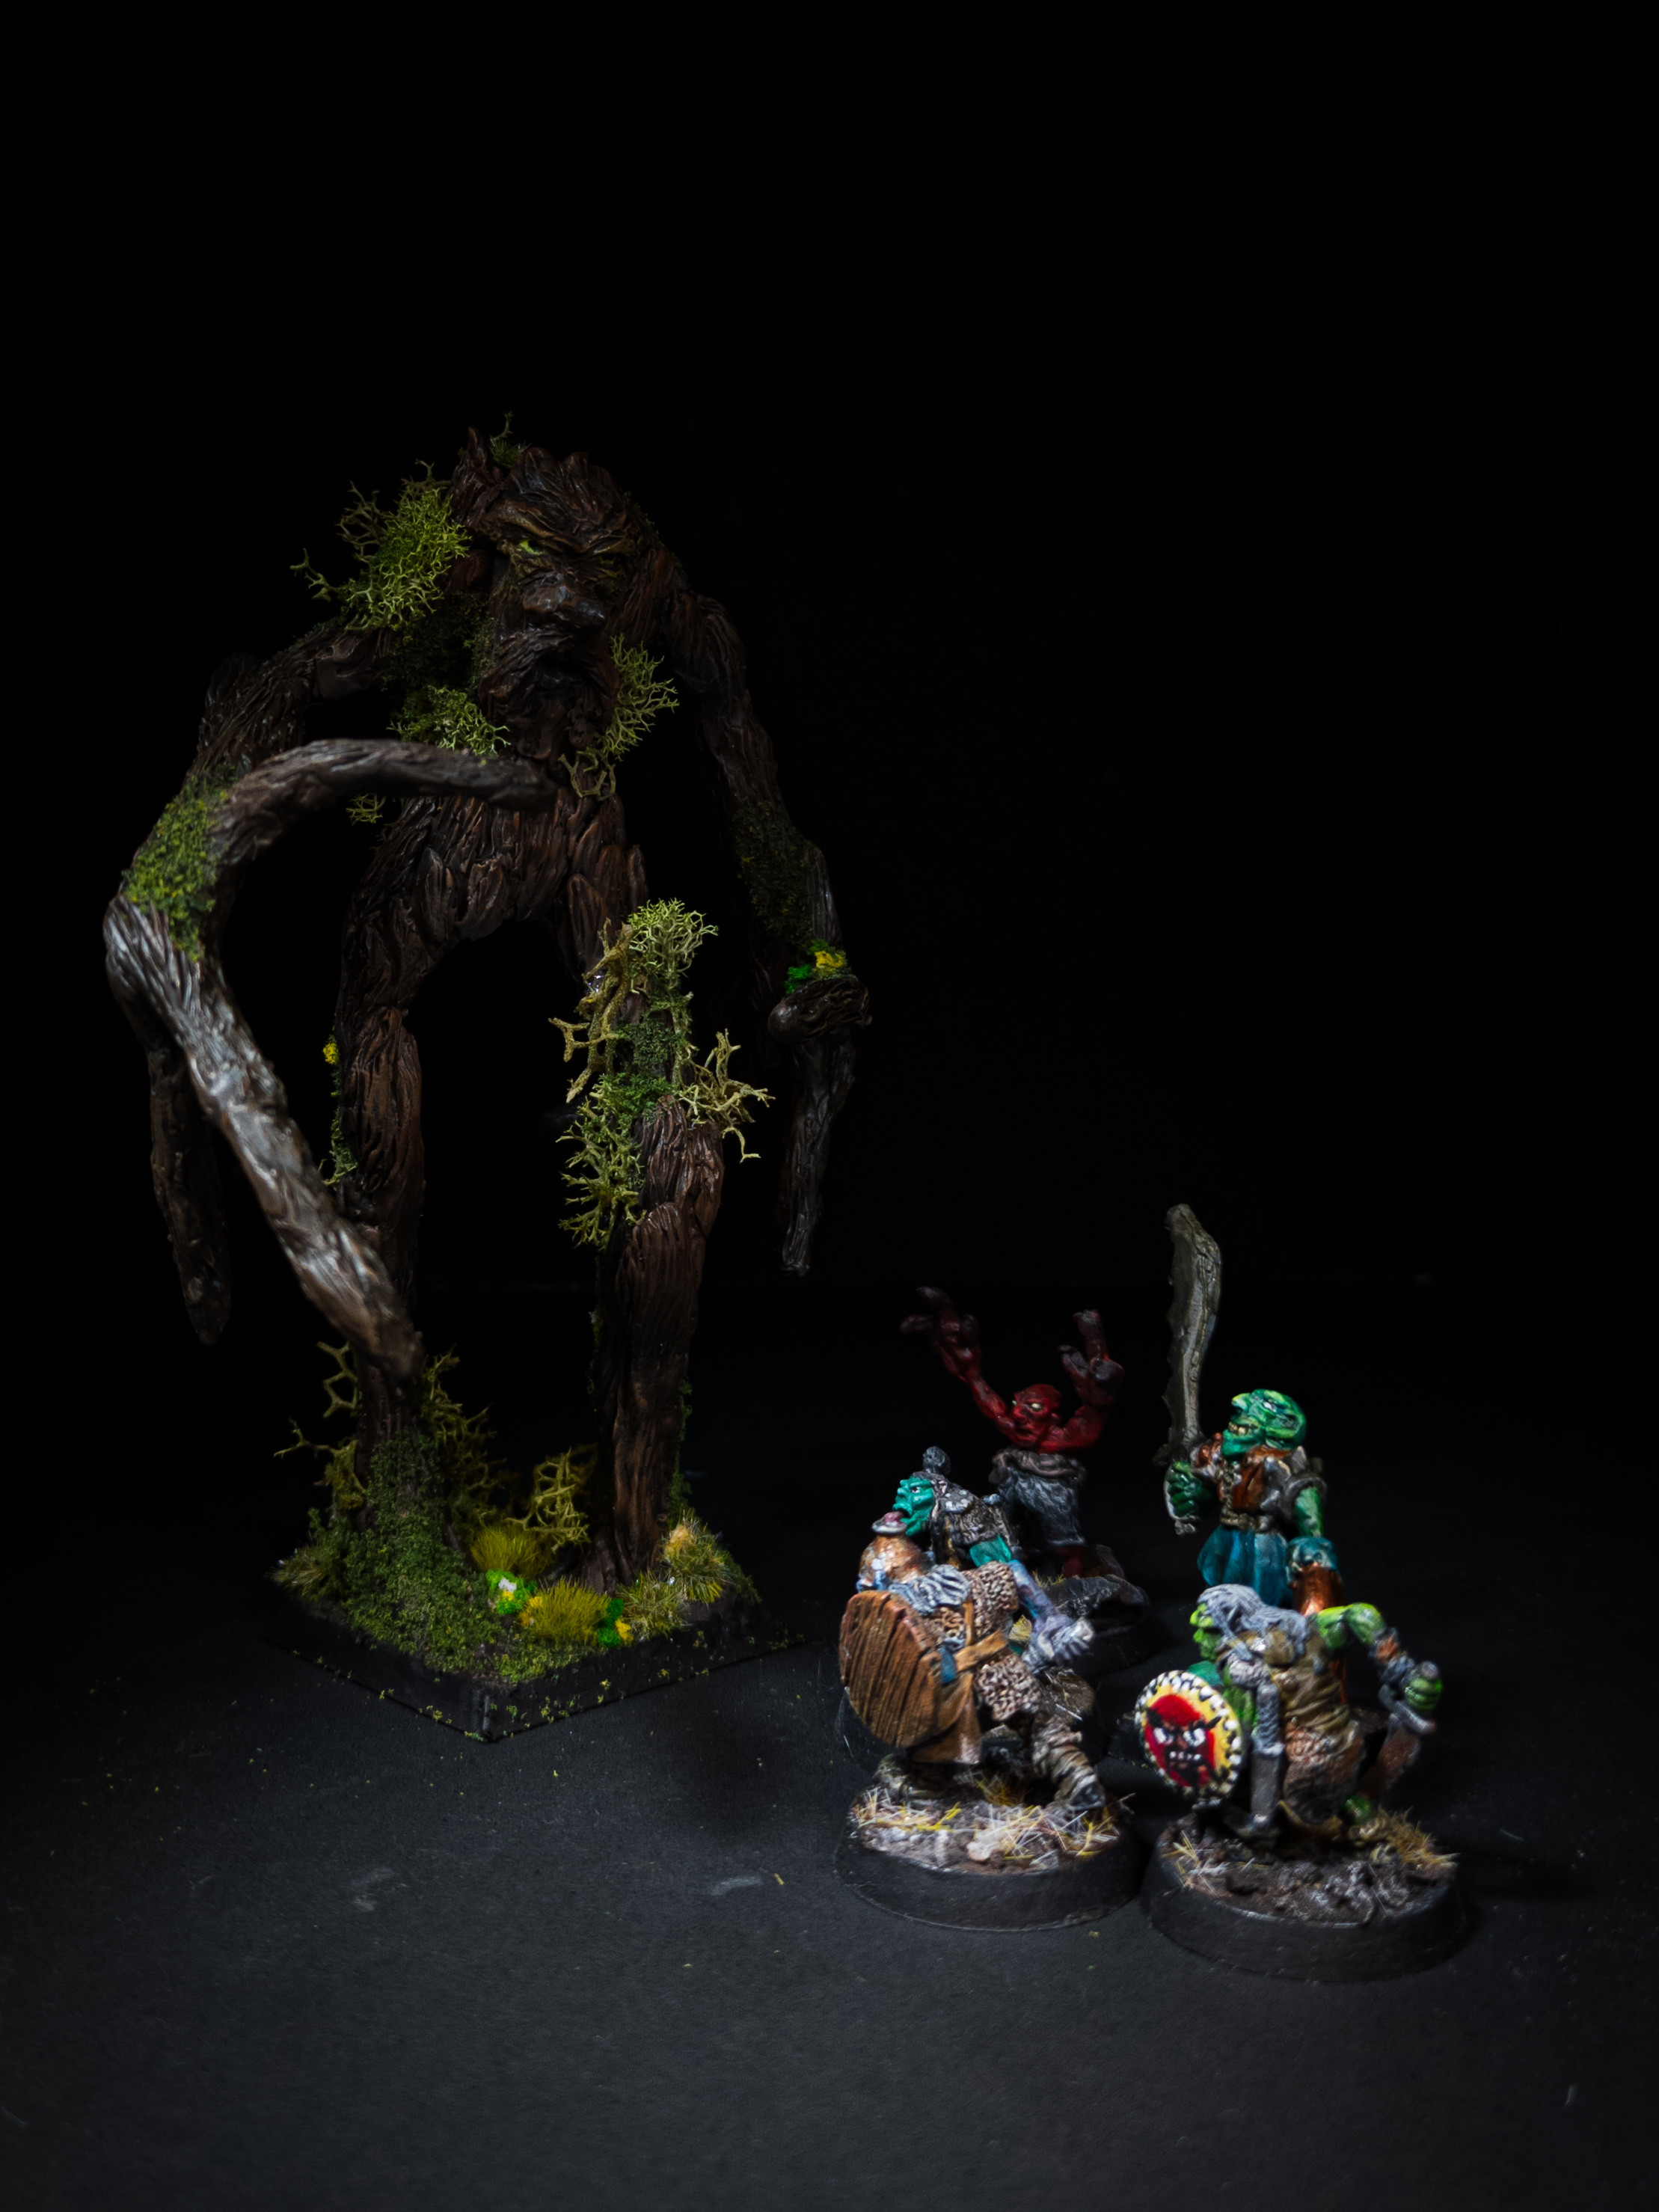
I got some models that I know are scupted by hand with these techniques so that I could have a scale reference - the perry miniatures. Probably better to just hit up a pal that has minis on hand (thx kyle for showing me). Modern minis are nuts though, due to computer modeling. Its not just scale ref, the pros have mind melting technique, its cool to see the upper limit.
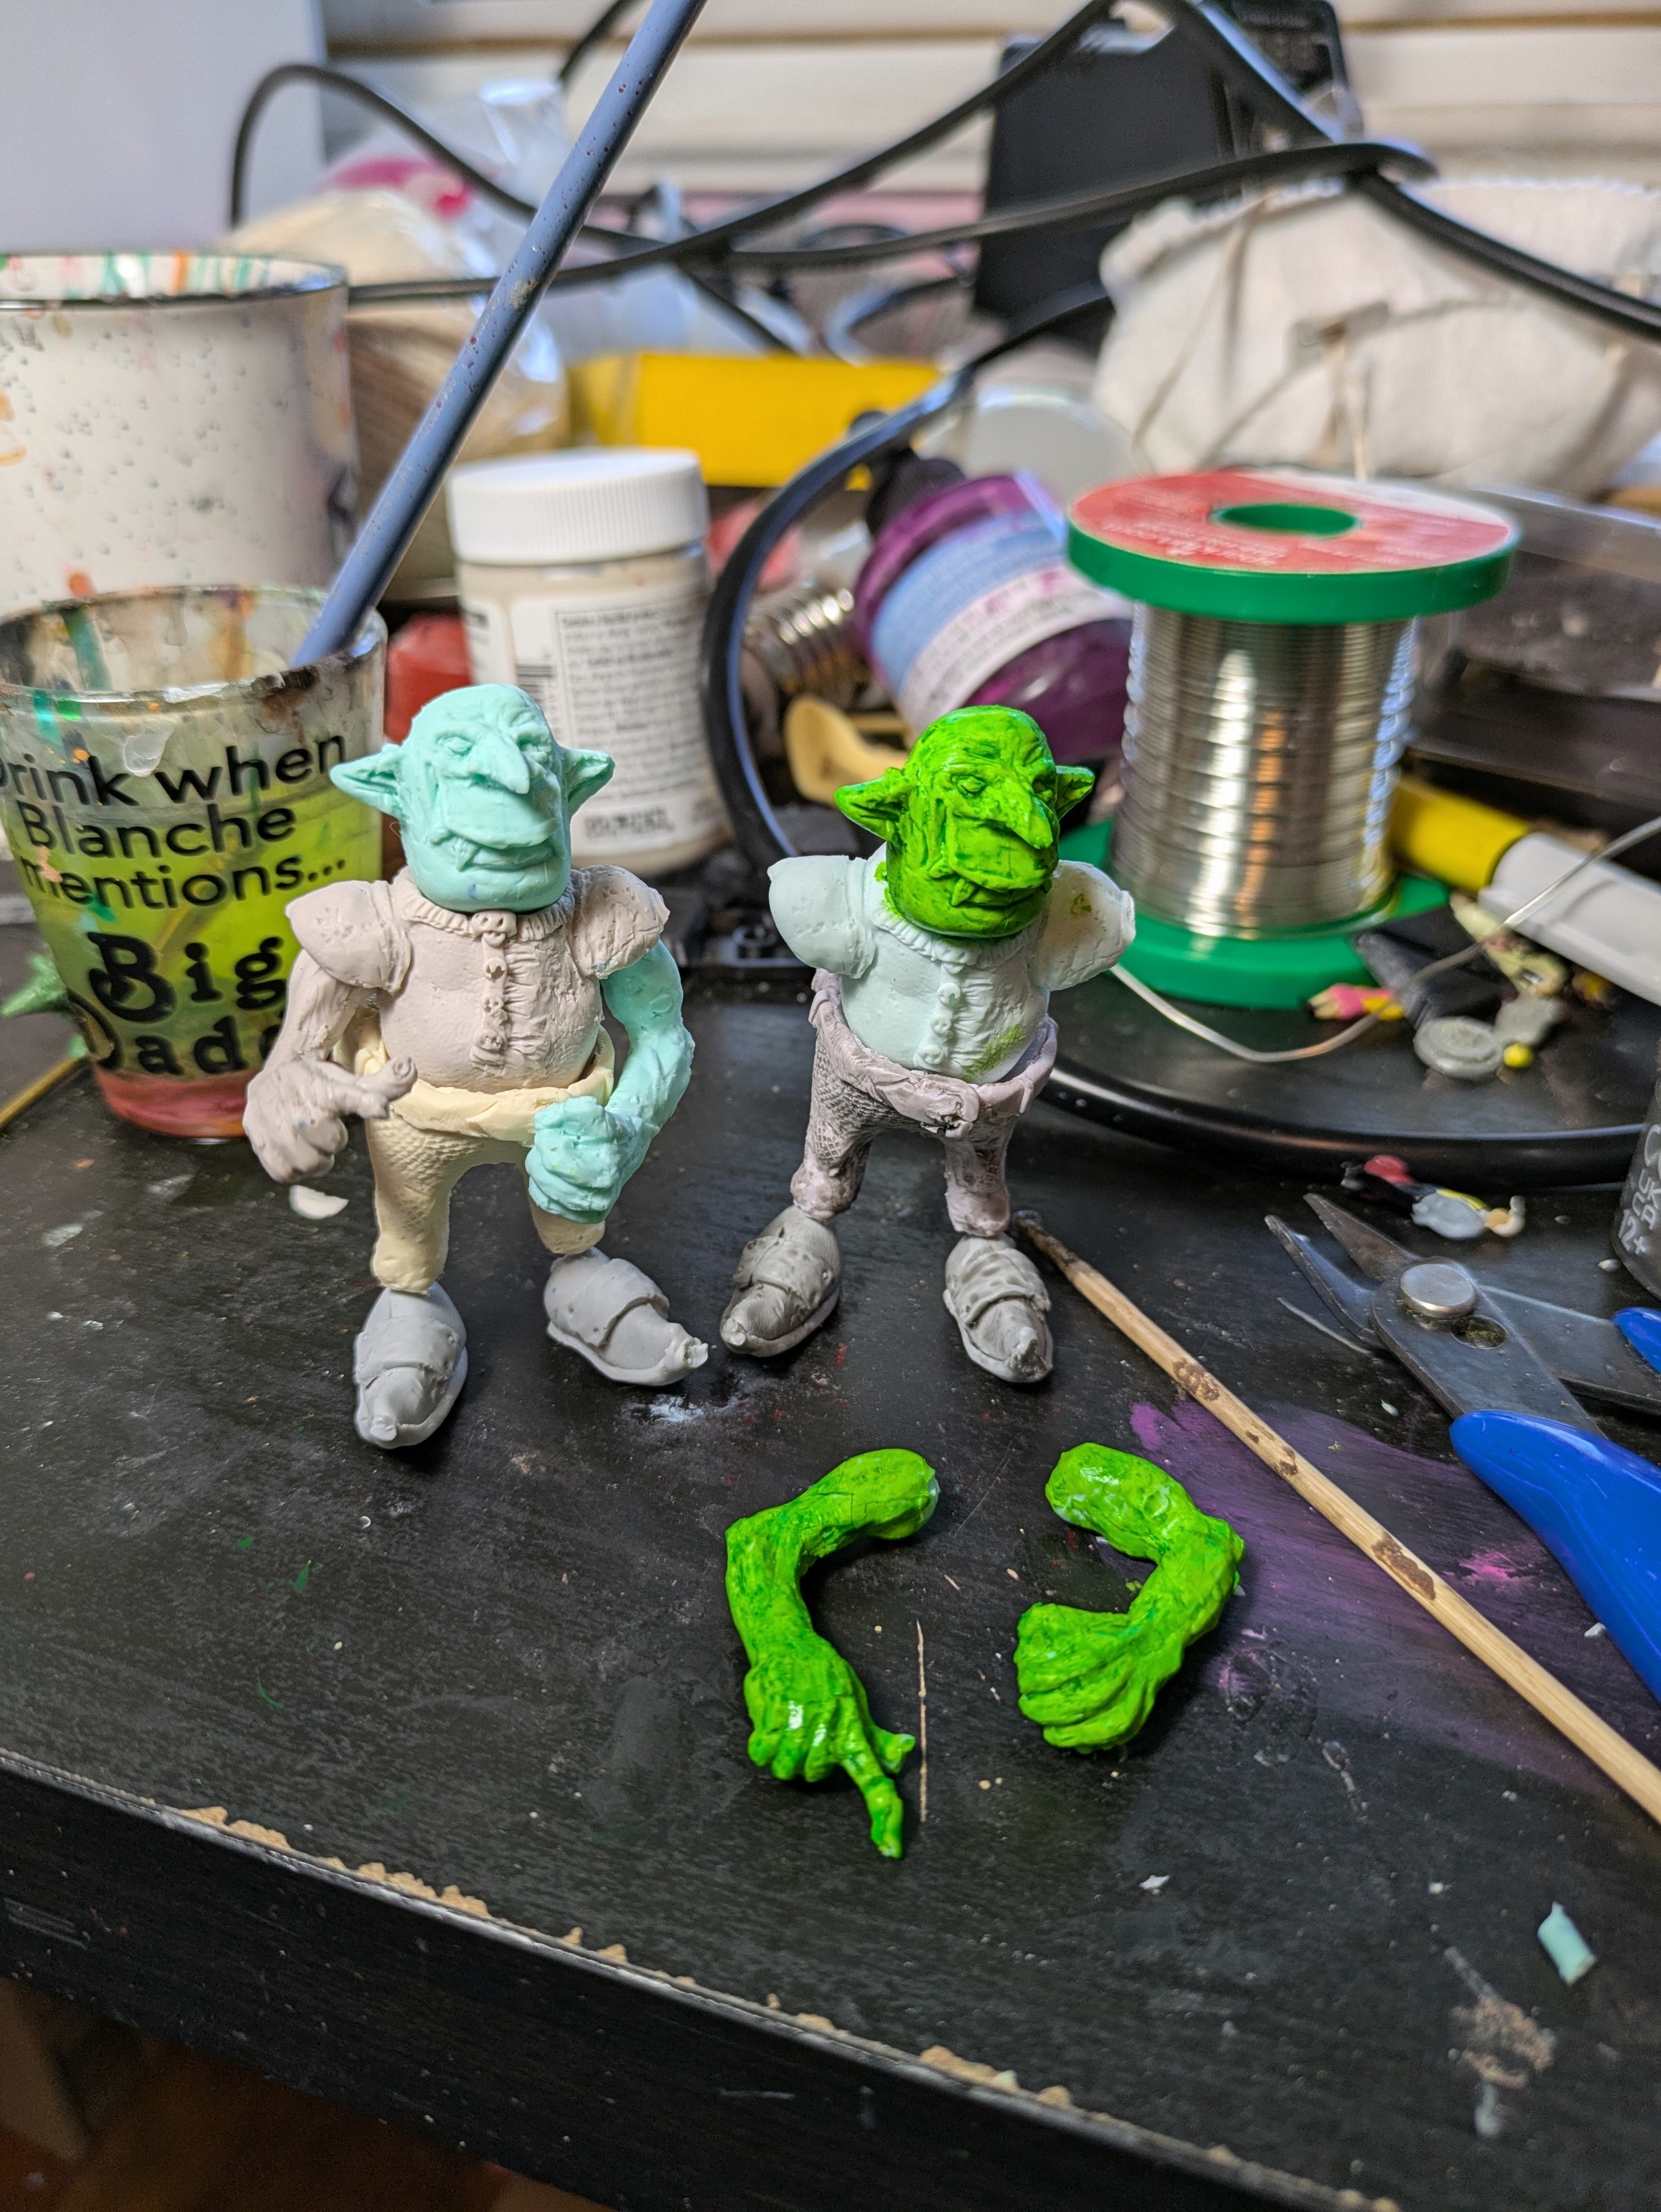
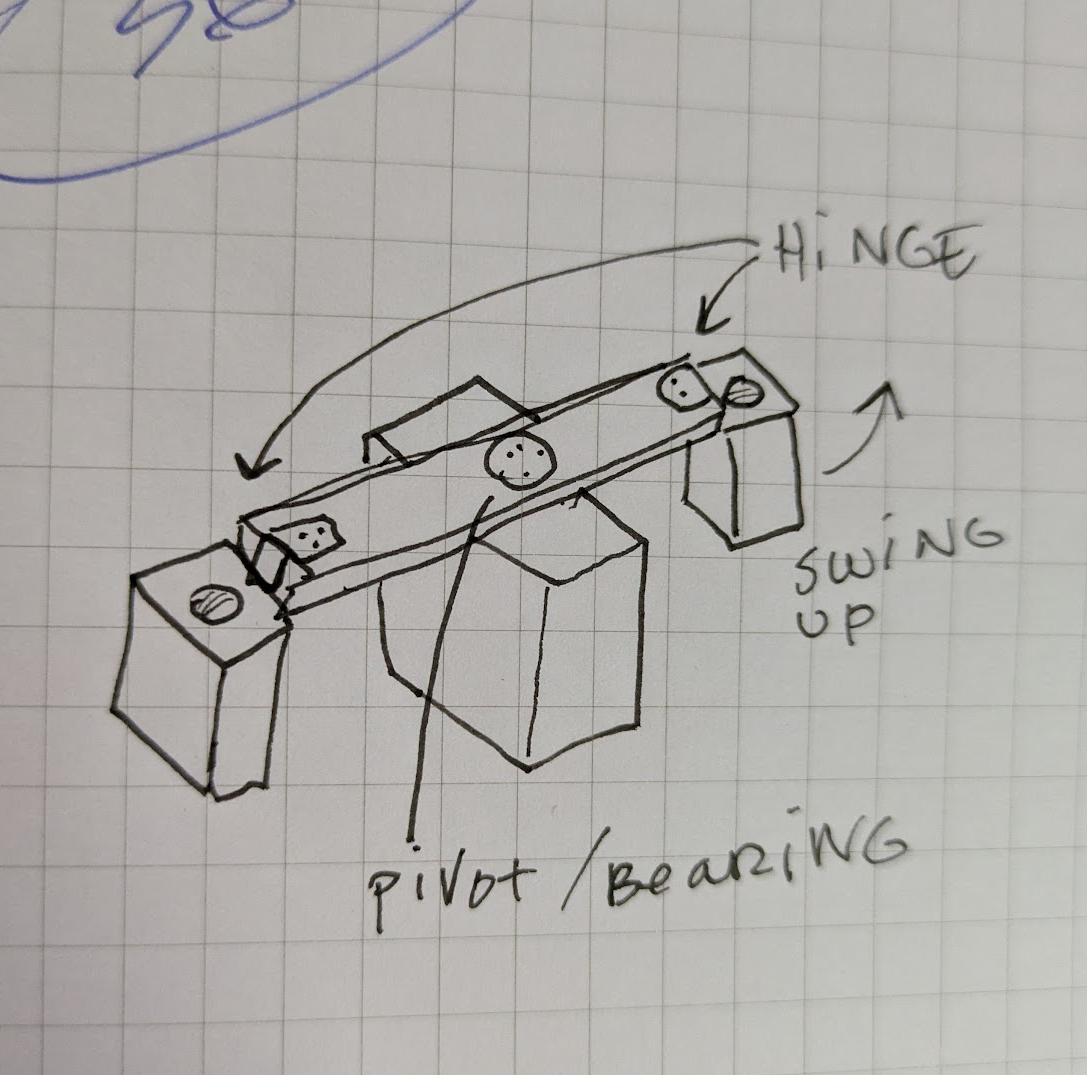
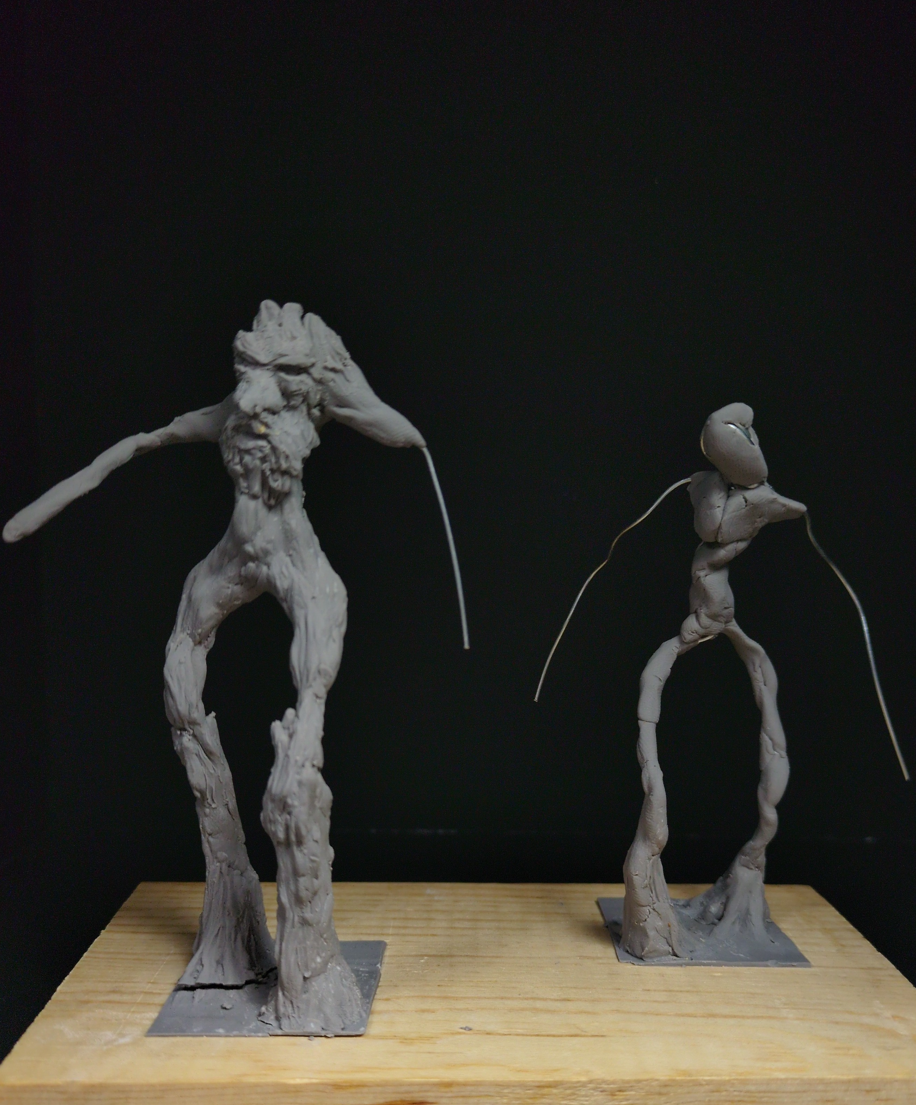
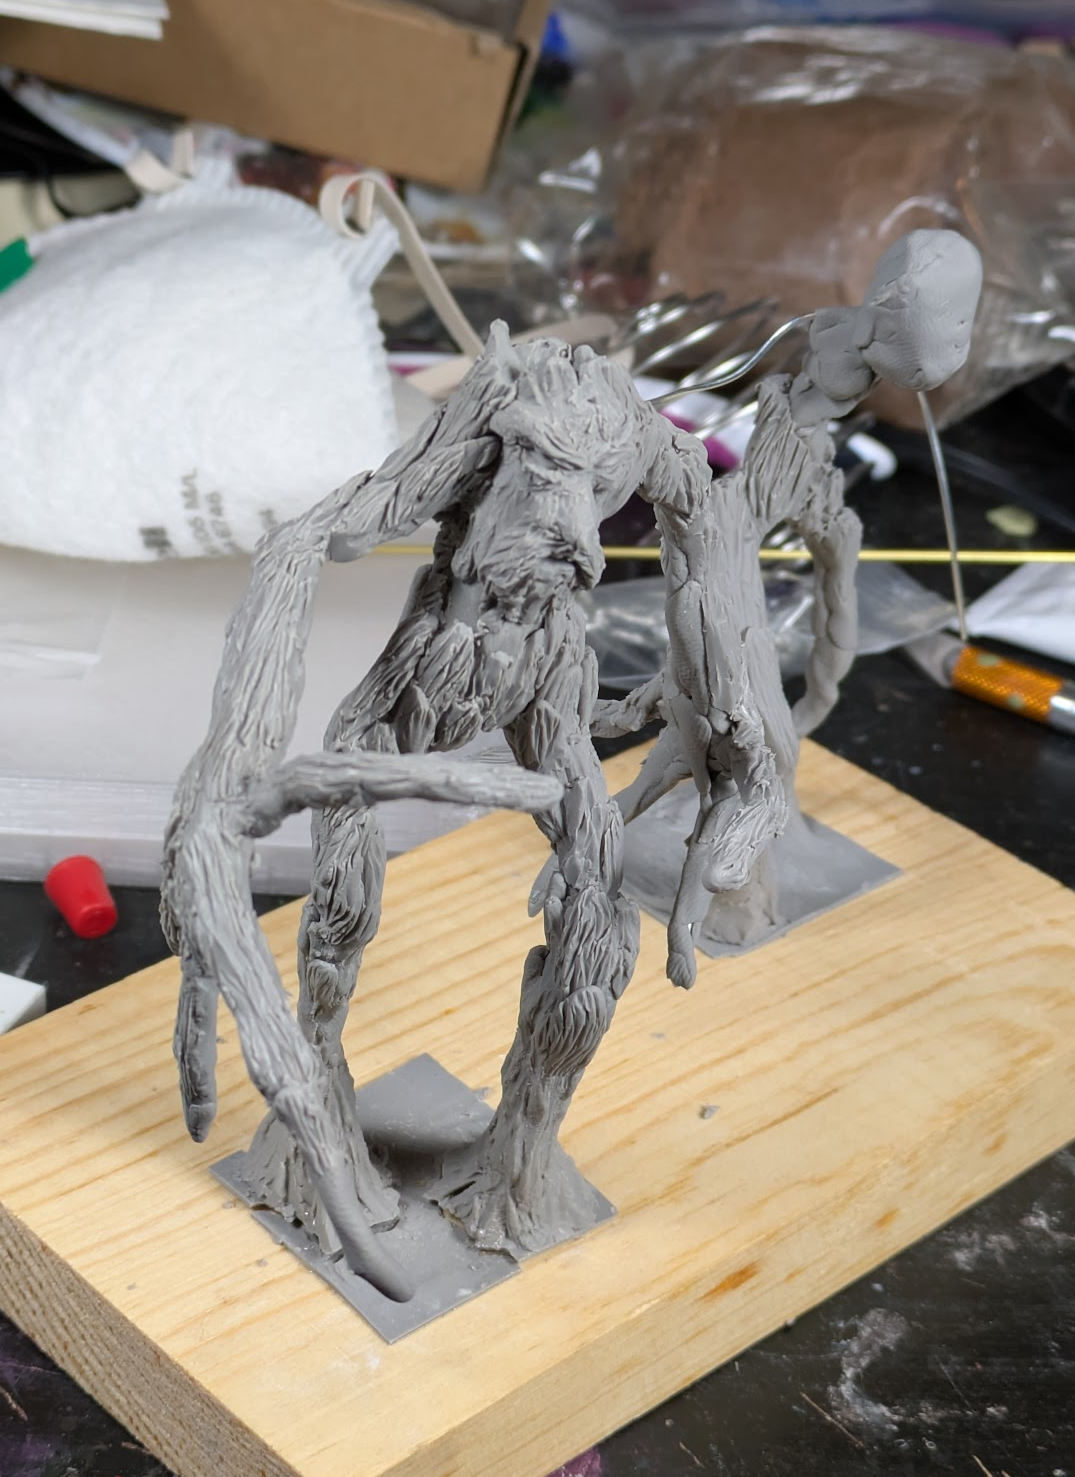
There are tons of ways to make armatures - I've been doing mine all in one (arms and legs together), but if you have a pin vise (a tiny drill) and super glue, you can do the main body first, then add in the arms. I can see the argument for this, its kinda annoying to work the body while you have these arm bits flopping around.
casting
It cost me about 200 dollars to get all the bits I needed for casting in pewter. I suspect I could have cut some corners and done it a bit cheaper, but I didn't want to be fiddling around with a stainless ladle and a propane hand torch. I followed the recipe in this video: https://www.youtube.com/watch?v=h6kh2RJl1dQ
The parts that are difficult to compress in the price are the high temp mold material, and PPE. You can theoretically melt down pewter you have on hand, but good luck lead testing it all. Its possible that its cheaper to work with resin, but I'm not interested to find out.
some loose thoughts
- the molds don't work until they heat up, so run a few casts through them before getting disheartened. you can chuck your bad stuff back in the pot and melt it down again. It may be possible to do this in an oven, but I don't wanna mix food and what the mold is made out of.
- use baby powder in the mold to get stuff into the nooks and crannies
- the weight of the metal in the pour sprue is critical to filling the mold. Make sure it is wide enough.
- the main pour passage needs to be wide enough to fill out the rest of the mold as well. don't make the mistake I made of giving your figures spindily legs.
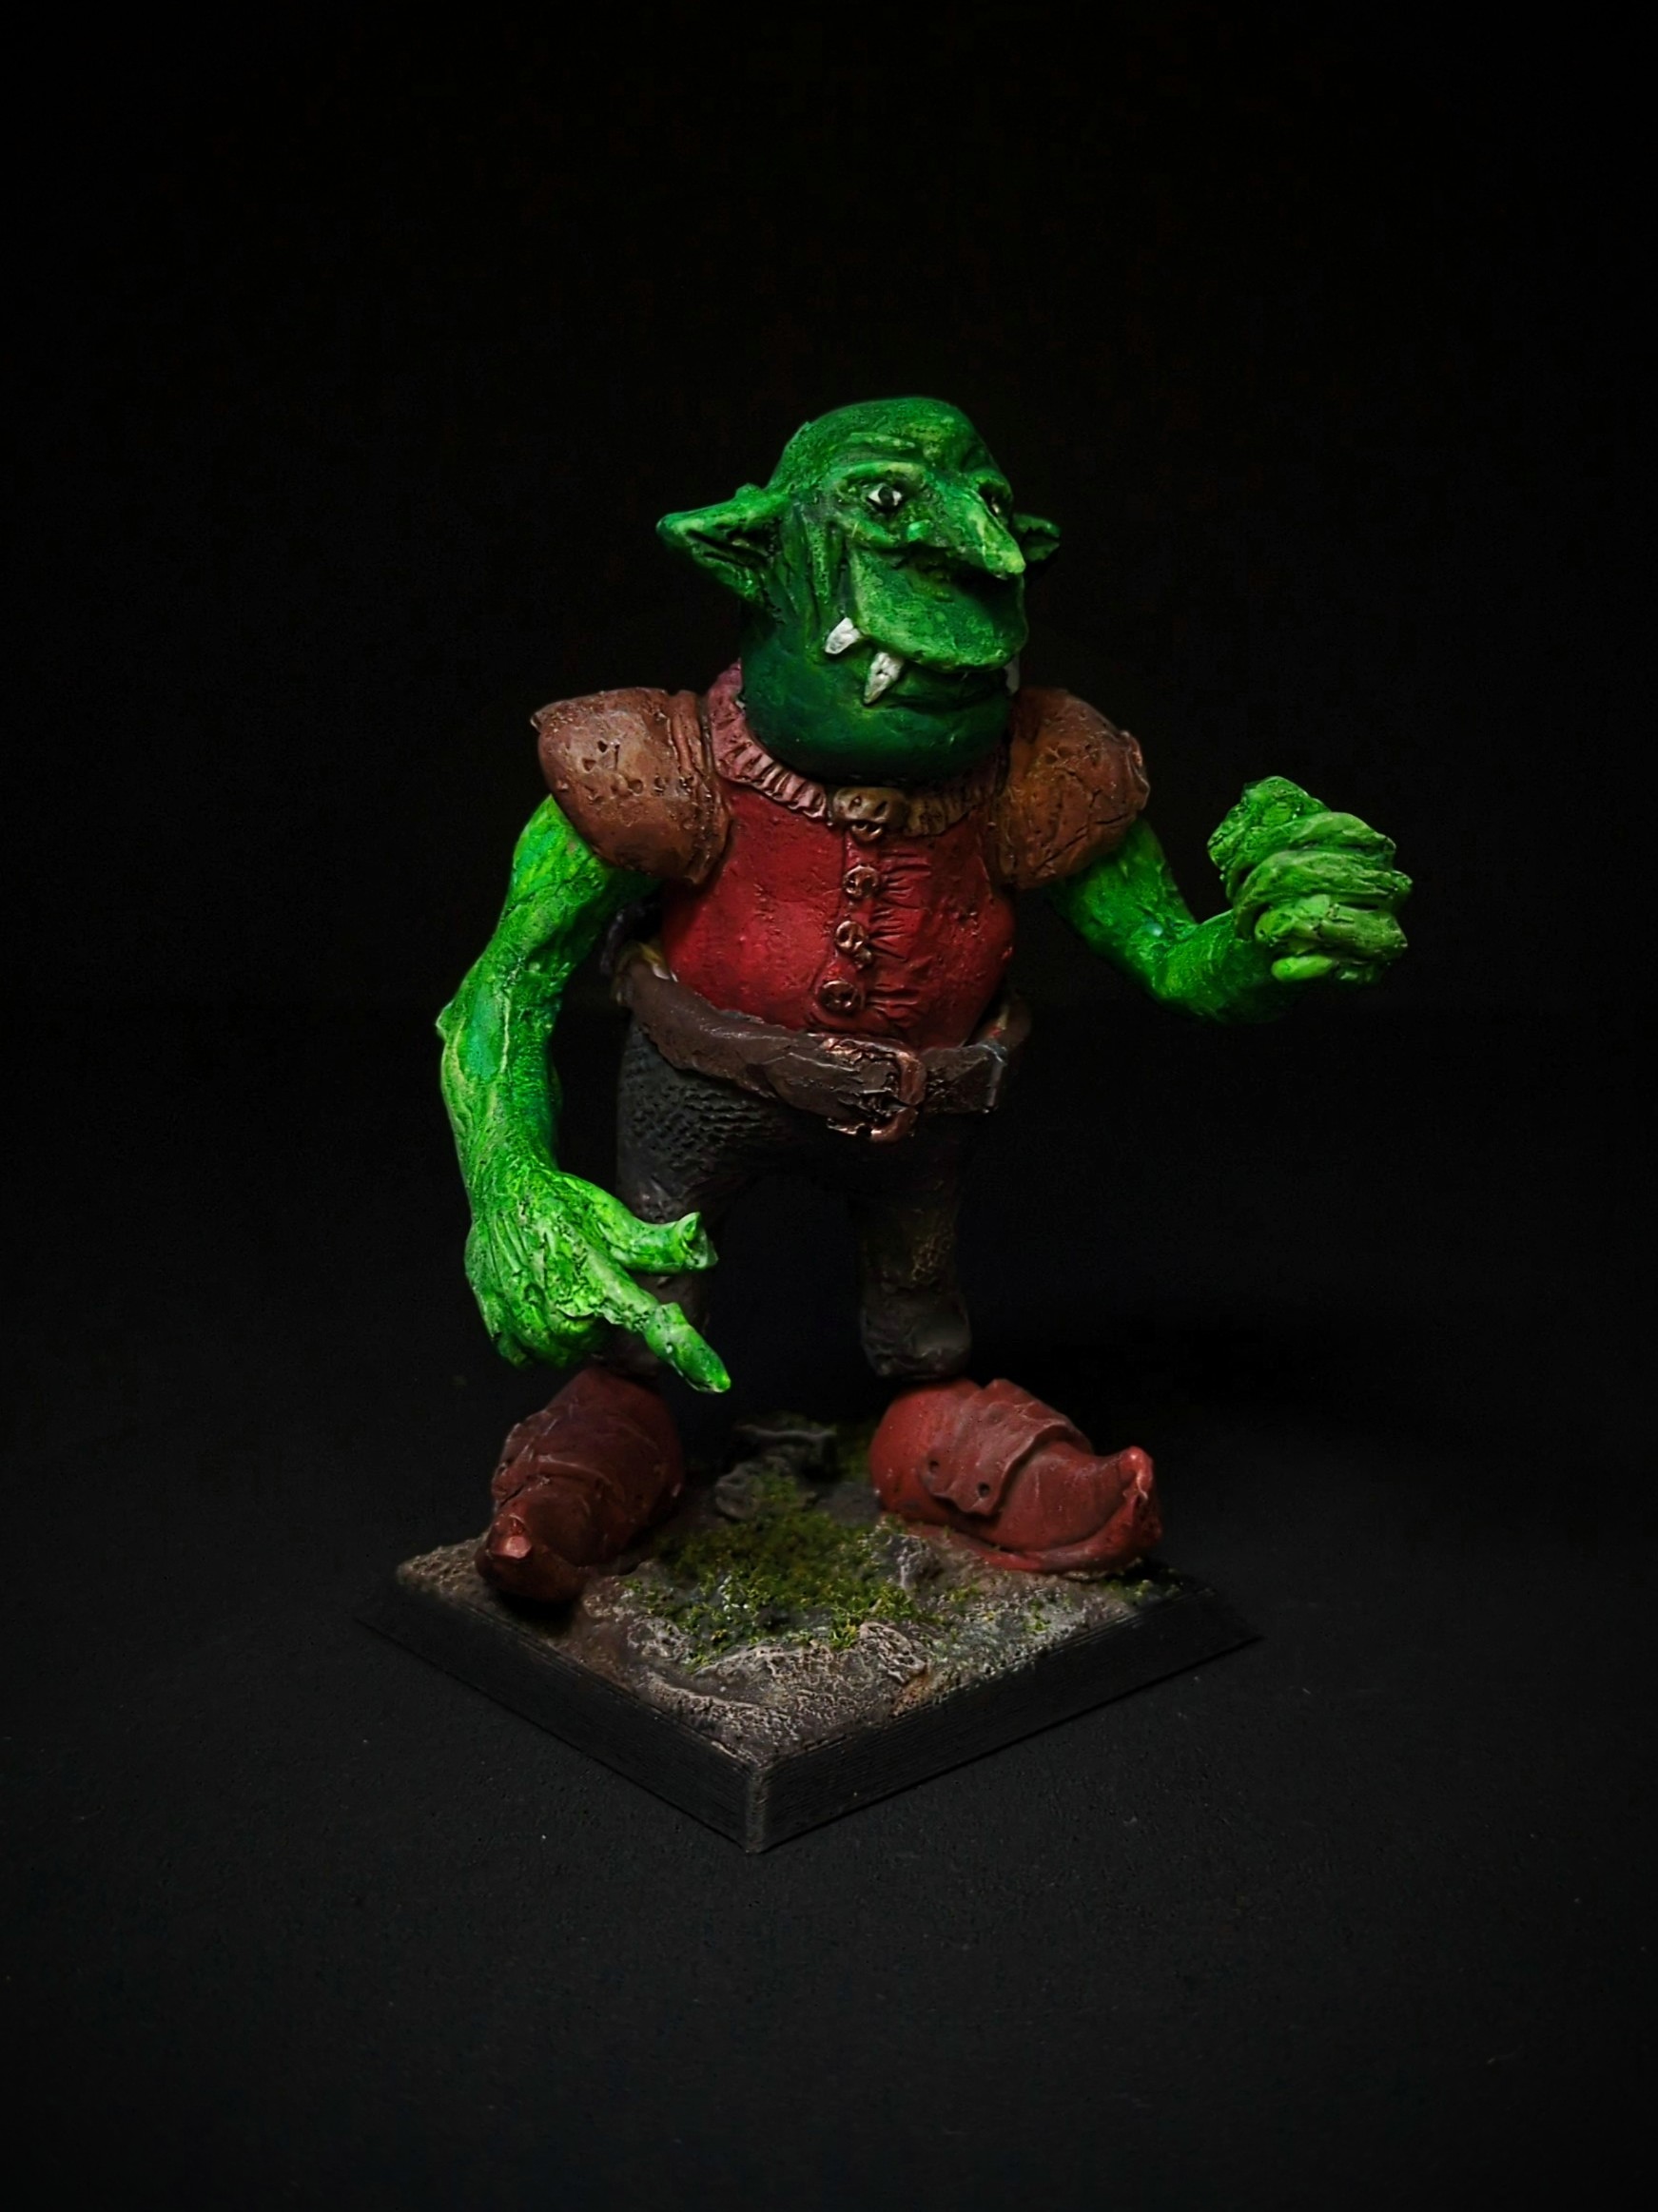
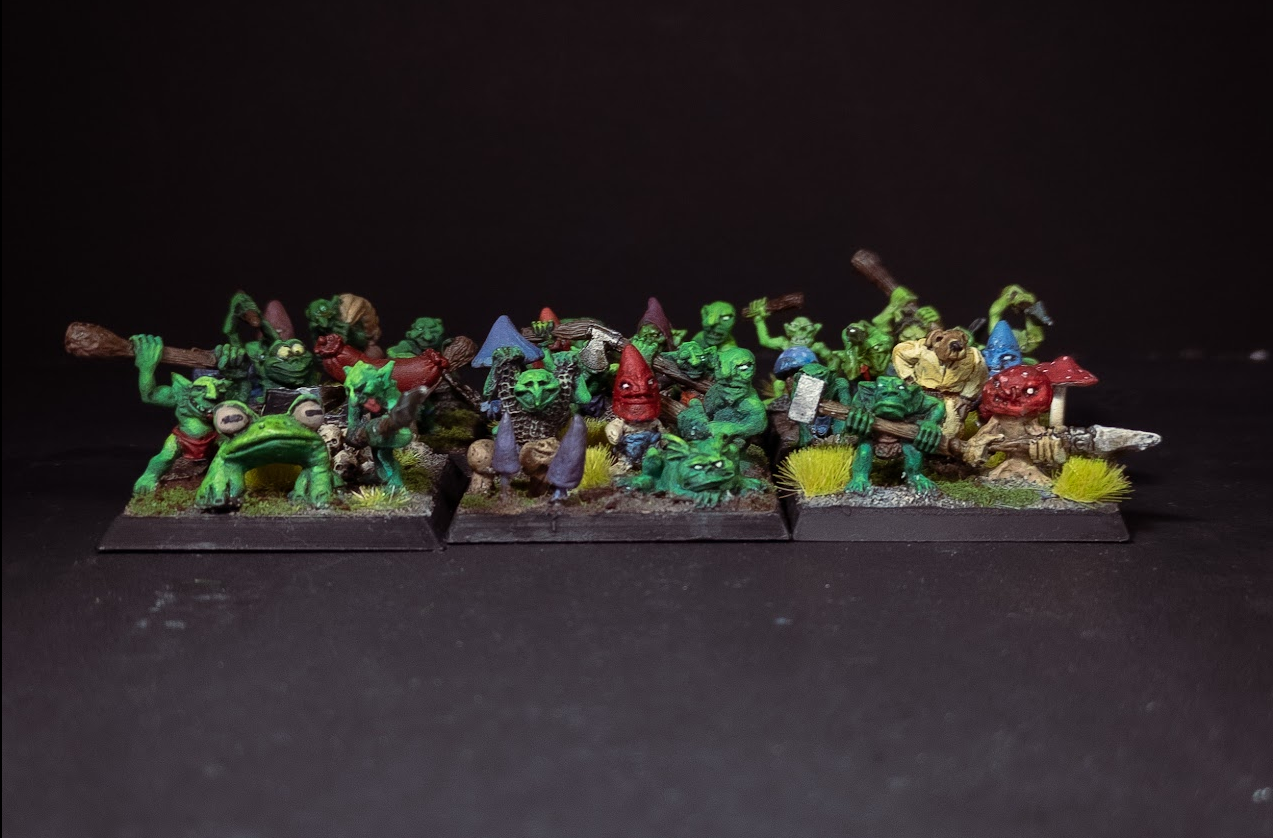
- working to the mold line is kinda fun! at it immediately makes your models look like old school warhammer.
- I didn't have any degassing chamber for getting the bubbles out of my mold material before pouring. Turned out fine somehow?
- cast minis feel fuckin awesome. Like a big chunky worry stone. Hell yeah.
safety
I didn't dig too much into the MSDS for all the stuff I'm working with, but here is my general understanding:
- contact dermatitis is a risk with these epoxies. I haven't got it yet, but some people do. I'm not wearing gloves when working with it so far.
- many of the putties, when cured, are food safe. Again, I'm not eating off of them, but they are marketed for both sculpting and plumbing work. So that end isn't that scary.
- they do have carcinogens in them, in particular: talc. I'm not too worried about this, because its contained within the putty when working, and when sanding it you can ppe up and keep the dust contained. Its also much lower quantities percentage wise than baby powder and quartz countertops, which seem like the main ways of getting cancer from talc.
- its plastic in the end, so if you are sanding, microplastic explosion. Wear PPE.
- if you go down the casting road: WEAR FUCKIN GOGGLES + gloves. pewter will spit if it gets into water or gets water into it.
- I'm also kinda grossed out by the rubber molds I'm using, they've been offgassing for weeks - no one mentioned this, and I find it pretty gross. Its not much, but enough.
so far, I'm just washing my hands before and after, and not putting my tools in my mouth to wet them (which is what some people recommend... classic way to injest poison imo). You can dig up MSDS for all this stuff, and its all been around for 40+ years.
loose resources
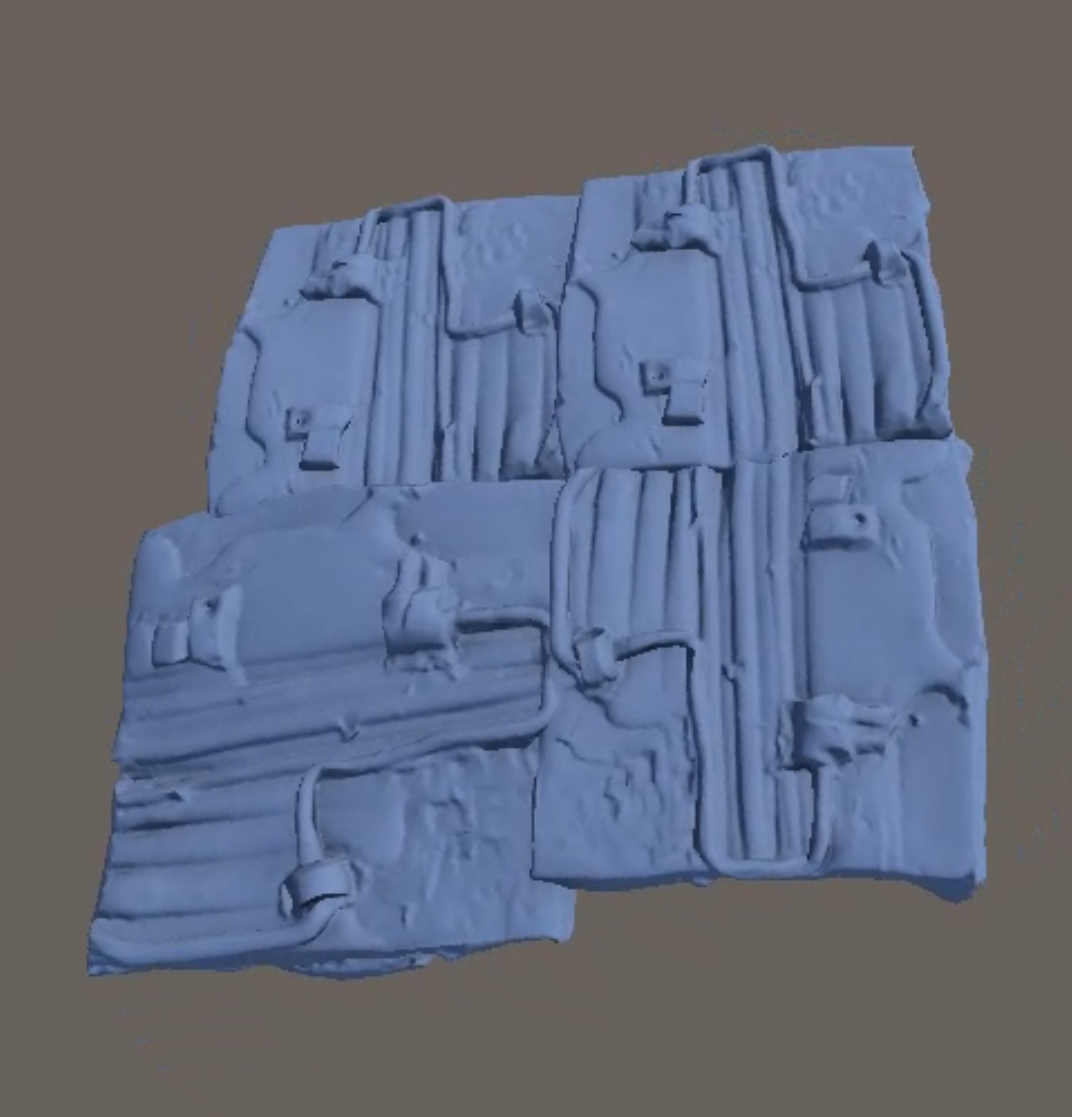 There is likely a way to down scope this, and work within the grain of the 3d scanning process. I've already found a few corners to cut that give me a nice mixture of visibly handmade marks, and digital crunch (rather than digital sludge). I've got some process things to wrestle with still, to wrap back to the original link, I'm trying to keep the scope top of mind now, and keep things to reasonable scope.
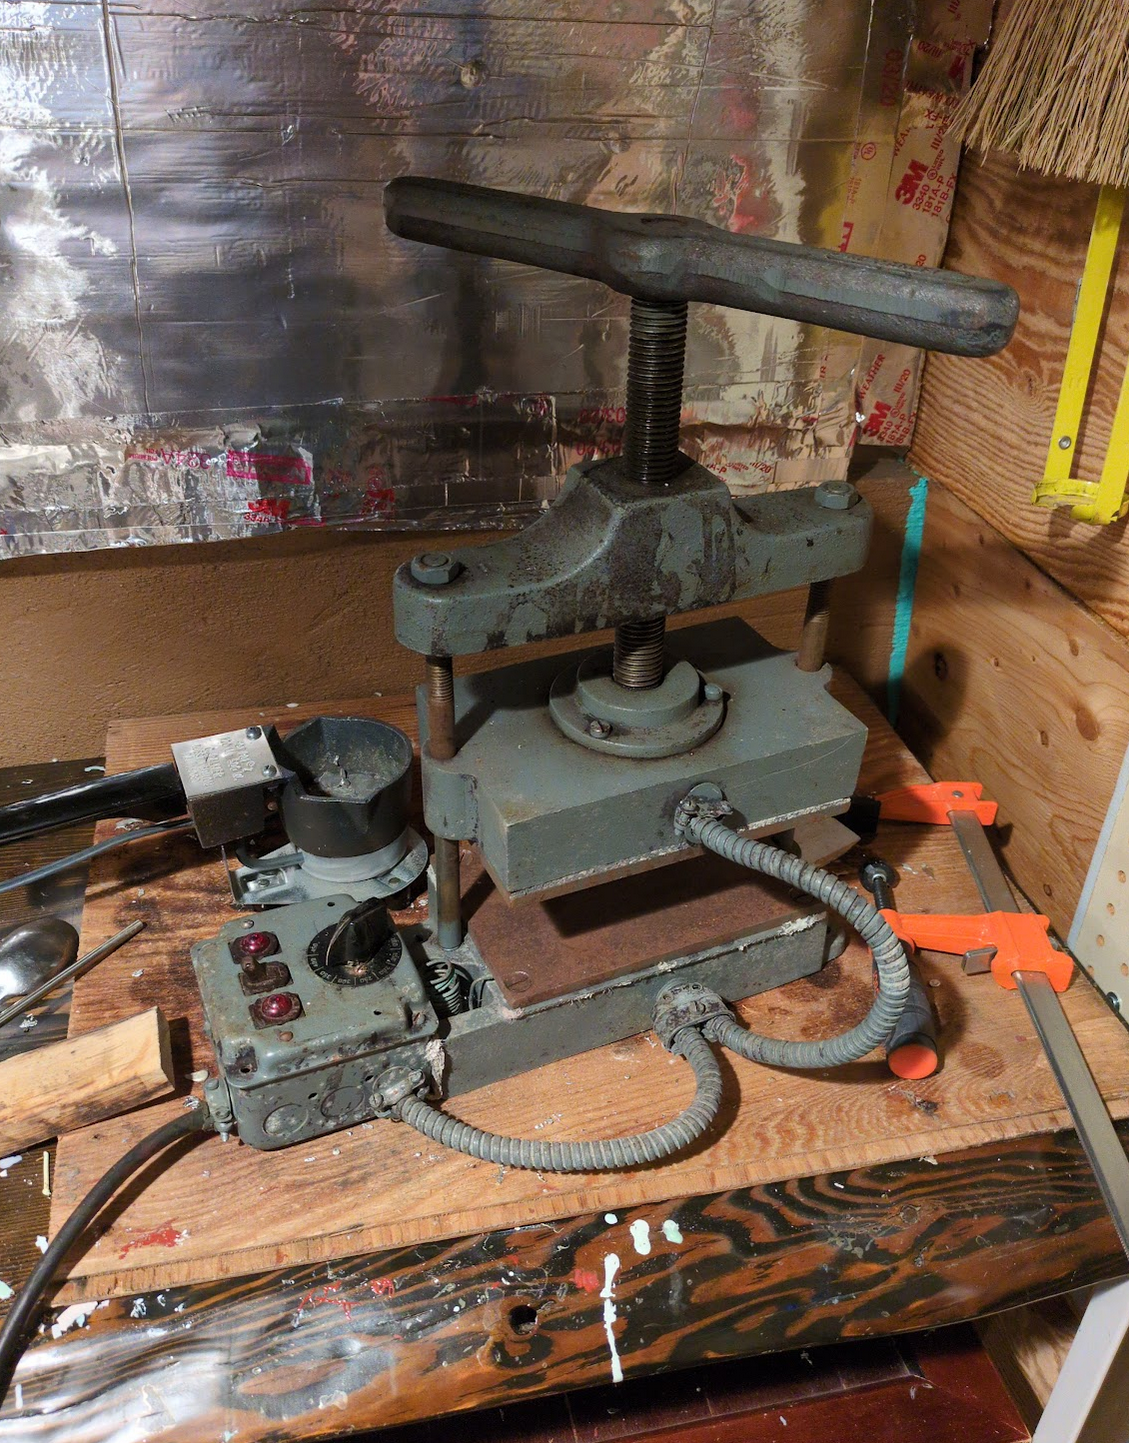
 Comment on